
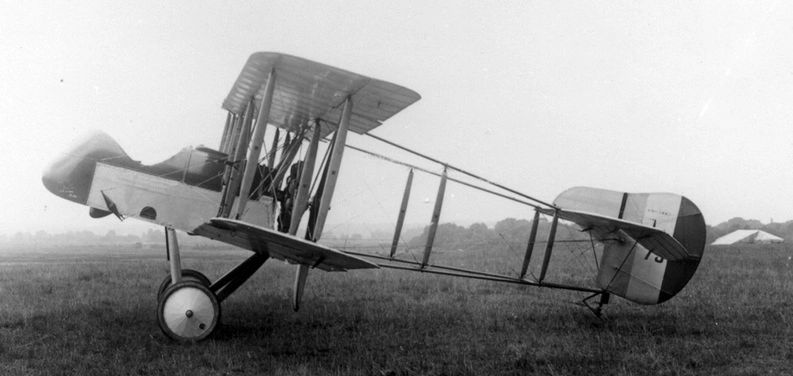
There was a period when I was a little grom that I was positively obsessed with airplane books. The drawings, the schematics, the history. Every time mom took my brothers and me to the library, I would check out one of the few large hardback tomes from their collection. Then the next time I’d borrow another one. And in short order, I’d be back at the first book, and the cycle would be repeated.
My particular favourites were always the ‘Great War’ biplanes, and boiled down from there, I loved the oddball machines. The push planes. Shocking, I know, but there’s something about the simple man-and-machine minimalism done differently that’s always appealed to my soul.
My favourite of all was the de Havilland-designed DH.2. A wood-and-wire-framed wee beastie with a 100hp rotary engine that could hit 150km/h. In a time of rapid aeronautic development, it was quickly outclassed by the fighter shapes we’d more typically associate with WW1, but it was still a rig that delivered for several aces.


The DH.2 was top of my mind as I cycled a round file through the pilot hole I’d just drilled in my perfectly functional SKS Mudrocker rear fender. As drill-and-file experiments go, this burgeoning misadventure had limited potential for catastrophe. The worst-case failure wouldn’t result in any damage that couldn’t easily be mended with some electrician’s tape.
The Mudrocker rear fenders, with their reversible rubber angle adjustment, are relatively lightweight and durable. But, absent a more aggressive angle option, on some frames, they sit quite close to the tire and make their presence loudly known in technical sections. It’s fair to say they have enough flex to create noise on most bikes in some janky situations, but on my Arcturian Voyager, in polite company, I’d decided the clacking was excessive.


My de Havilland-inspired plan, or perhaps obsession is the better word, was to thread a chainring nut/bolt assembly, with washers, into either end of my fender. From there, I would use a roadie brake cable, down to the shape of the cable end, to tension the Mudrocker to a point of silence.
For all my ideas, the challenge I could not work out was how I was going to adjust the cable to the required tautness, but for all the RTFM* in the world, sometimes learning as we go is the only way forward. As you’ll see, it turns out I finally discovered a solid use case for carbon fibre headset spacers.
I may still try to add some sort of space-conscious barrel adjuster to the seat tube end of the fender. Having the cable run along the surface of the Mudrocker would certainly provide a stealthier take on tensioning. But the headset spacers are held tightly in place by cable tension, and if the system stretches in, there’s always the option to add more or taller spacers.
*{Read the F***ing Manual.}


Yeah, so. Shared for inspiration. I receive quite a bit of correspondence from folks buying themselves an education in bicycle repair. Sometimes it’s just purchasing a proprietary tool they’ll rarely use and investing the time to work through a job. Other times it is folks on or over the cusp of wrecking something fixable, or, oof, not so fixable. In the grand scheme of learning, even properly FUBARing a frame or fork, or rear hub, is relatively cheap.
I always provide the same advice. Find and patronize a great bicycle shop that’s happy to make a buck helping you over the finish line when you’re taking your blue skillset to a double black repair job. Or, sometimes, when you’re taking your double black skill set to a blue repair job and shit just goes sideways in a corner.
But if you’re keen to do it yourself, then reach for the bearing press, shim kit, hand file, drill, or whatever tools you need to chase down whatever repair or modification you’re imagining. Learn something new. Spend some quality time with your bicycle(s). Justify another toolbox upgrade. Beautiful.
Of course, it goes without saying, drilling holes in your fenders, etc., definitely obliterates any warranty.
Welcome to MEATengines! Whichever way you rolled here, I hope you enjoyed this piece. If you did, donations to the site are always appreciated but never expected. Any questions, concerns, or comments; feel encouraged to drop me an e-mail, or join us at r/MEATengines.
,